Tuesday 13th - Bits and pieces

.jpg)
[Photo : Paul E.] Earlier in the day Maurice was back in harness and helping to flatten the new canvas on the roof of the Toad brake van.


Careful measurement has been made to locate where the chimney will poke through. Wood templates, one of which is shown, have been made to ensure the correct size.

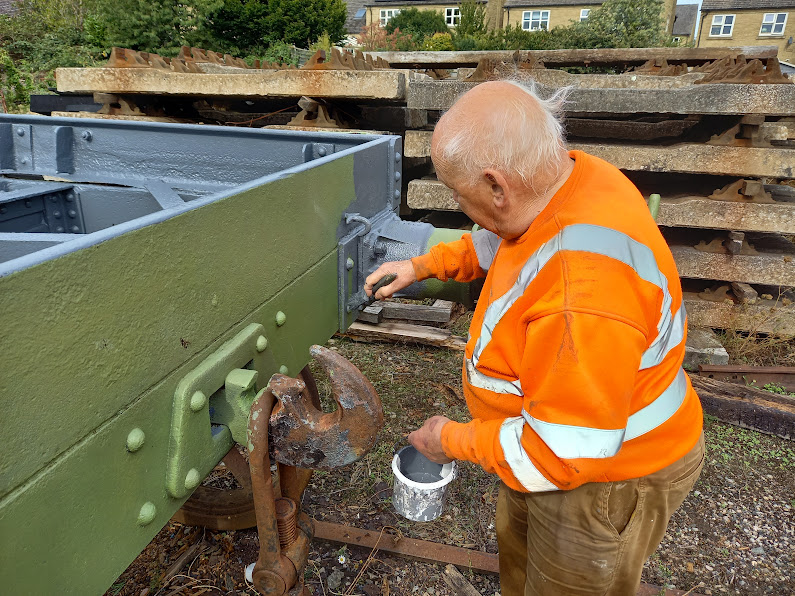
The new footboard and supports have been topcoated.

On 4th August Neil Shepherd entered the following comment at the end of the posting for Tuesday 2nd August: -
"I've been trying to work out how the grab rails on the Toad are assembled. It's got me totally stumped! Does it involve a combination of RH and LH threaded pipes and fittings?"
Firstly, sorry Neil that it's taken so long to get back on this, but I kept forgetting to take a close-up of the relevant part of one of the grab rails. My excuse? All the usual distractions, etc.
Looking at it logically I think you could well be right about the right and left hand threads. I imagine all the rails have threaded ends, with the horizontal ones having, as you suggest, reverse threads. As the supports are for the horizontal rails, the vertical rails probably had standard threads and were built up first, and then positioned at each end of the horizontal rails. Then the horizontal rails were slowly turned to enable the reverse threads to screw into the corner pieces. Both horizontal rails would be turned at the same time and this would gradually draw in the two end rails until deemed to be tight enough and with the overall reactangle of grab rail the correct size. It would need four people to construct, but I think this would work.
Is there anyone out there with any knowledge of this?

Rod is gradually working his way around all the coaches checking the seat numbering, including the two on loan from the NYMR, of which this SK is one


The thoroughly cleaned up kitchen door from RBr 1675 is reversed and the back given a coat of light grey undercoat, leaving the metal window clear. Later in the day, with the paint already dry, it was taken into the Door Team area.

Meanwhile the next door from 1675 is now on one of the Door Team's benches and Ainsley and Rod are discussing it's refurbishment following the stripping out of all the interior and removal of the lock, etc. It is now in the Workshop awaiting my attention on Thursday.

With the vertical demarcation tape repositioned, Richard is busy glossing the south end of CK 16221.

In the corridor of 16221 nearly all the thin compartment door covers have been loosely put in place by Dave H.

Robert is attaching veneer panelling above the south end door on the Cotswold side. Still plenty of varnishing to do.

The sanding of the very long strip was completed, and now it has been stained ready for varnishing.

One of the compartment doors had lost it's tracking after being stripped down. However one of our spare doors was able to help out and while the veneer cover practically fell apart, not so the screws holding the tracking. Thankfully WD 40 and a bit of brute force sorted it out.

Dave began cleaning it up and I completed the job when he had to depart for the day.

It has now been placed by the relevant door.

Another job was to clean the brass doorway threshold strips for 16221.

The one for the centre door on the Cotswold side had already been fitted. It was removed, cleaned and then put back.
Plenty of bottom door roller assemblies in one of the CCT's. Probably 4 - 6 of them. All freed up and ready to use.
ReplyDeleteOpen the door and they are in a 'bin' to the left.
Once the wheels are 'free', and to ensure the ball bearings are fully lubricted, I run them up to speed against a wire brush in an angle grinder.
THAT makes 'em 'Sing'.
Ken.
I think Ken is talking about the big green Elephant Van. If not, perhaps CCT2 (may even be some in the container?)
DeleteThanks for the tip off about the spares.
DeleteRegarding using an angle grinder with brush, that's exactly what I did. It brought them back to a shine and it certainly free'd up the wheels.
On Toad handrails, gwr.org has this to say "After 1912, handrails were 1 3⁄32" o/d (nominal) gas pipe, joined with gas pipe fittings at the corners. The handrails were also secured to the intermediate T-section side stanchions."
ReplyDeleteI'm pretty certain some of those handrail sections have been replaced, probably with air pipe fittings or similar, at some point, so it's all a bit of a mishmash there.
PS don't take pictures that close, I'll have to paint that bit we missed now! :)
Sorry to ask that "awkward" question. There's too much paint on the grabrail already to tell if it's LH or RH thread.
ReplyDeleteBTW, I used to volunteer on the Nene Valley Railway, and have my guards equipment still. If you are interested I've got a BR satchel, bardic lamp, carriage tail lamp, keys, and flags. And a BR style cap ( XL ) As they say "Free to a good home". Jo Roesen has my email address.
Neil Shepherd
Dave,
ReplyDeleteThanks for the lengthy reply, and to Alex for his response. I guess a mix of gas and air pipe threads would do the trick.
Neil Shepherd